In 1990, I skied around Crater Lake from April 13th-15th. The trip was on my “to-do” list since working at the Park as a seasonal Park Ranger in 1973.
While Crater Lake features a variety of designated cross-country trails for skiers, skiing around the lake is the ultimate way to explore the park. According to the Park Service, in recent Winters approximately 80 skiers and 30 snowshoers travel all the way around Crater Lake during the period the Rim Road is snowbound, which typically encompasses late Fall, Winter and early Spring. Under the best conditions (clear skies and a settled snow pack), the 31-mile loop takes an average of 3 days to ski.
Based on my experience, I knew the park gets an unbelievable amount of snow each year. In the 1990s, average snowfall was 493 inches/year. More recently, snowfalls have decreased but, nevertheless, since 2010 snowfall has averaged 377 inches/year which is over 34 feet of snow. Given these totals, I do not think the dead of Winter is the best time to ski the Rim for a number of reasons. First, the route crosses several avalanche runs and, if the snow is not stable, you would have to detour away from the Rim to ensure safe passage.
If you are on the Rim in a storm, you might be put into a survival situation quickly where travel is impossible due to wind and whiteout conditions. Second, the park can get massive dumps and trying to ski when it is snowing could require difficult trail-breaking for 31 miles. Third, there is much more daylight later in the season. Finally, and most importantly, you want clear weather to enjoy the incredible views. If you have never visited the park, you have missed one of the top 10 scenic wonders in America.
Even in a low snow year, snow accumulation around Crater Lake tops anything we get in Idaho.
I recommend making the trip in late March/early April and only when you have a good long-term forecast for dry, clear weather. In 1990, I had to contend with a busy work schedule so I planned my trip to cover 3 days. I recommend planning a 4-day trip so that you can spend a day skiing the terrific open terrain between the Rim and Mount Scott. The Park Service attempts to keep the South Road to the Rim open year-round which means good access to the Rim Road. The Park maintenance crew starts plowing the Rim Road when possible in late March/early April. Your task is to plan your trip once the weather has settled down and before the plowing has started. In 1990, the park had plowed the first mile of our route, forcing us to walk that distance which would not have been a problem if we didn’t have to carry our sled. The sides of the road drop off steeply on one side and were too cliffy to ski on the other.
We took a dome tent, Winter sleeping bags, medium-sized packs and one sled to haul most of our equipment. We skied with 3 pin bindings with no-wax telemark skis and skins where necessary. After the first mile, we were able to ski the remaining distance on deep, bomb-proof snow. I should note that our route did not take us completely around the lake. We parked at Rim Village and ended our ski at the Park Headquarters, which left us about 2 miles or so short of a complete loop. There is now a designated trail from the Headquarters to the Rim if you want to be hardcore and absolutely complete the loop. I was happy to hitchhike up the hill to get my car.
The route follows the Rim Road but the snowpack is deep and the road will be buried. Keep in mind that the route is not marked, though following the road cut is not difficult for the majority of the distance. I did not ski the detours around the avalanche-prone areas so I cannot tell you if the detours are easy or hard to follow. The bottom line is that if you decide to attempt the trip, you should be experienced in Winter camping, backcountry travel and know how to travel safely in avalanche-prone area.
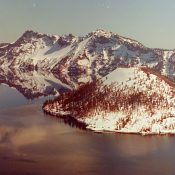
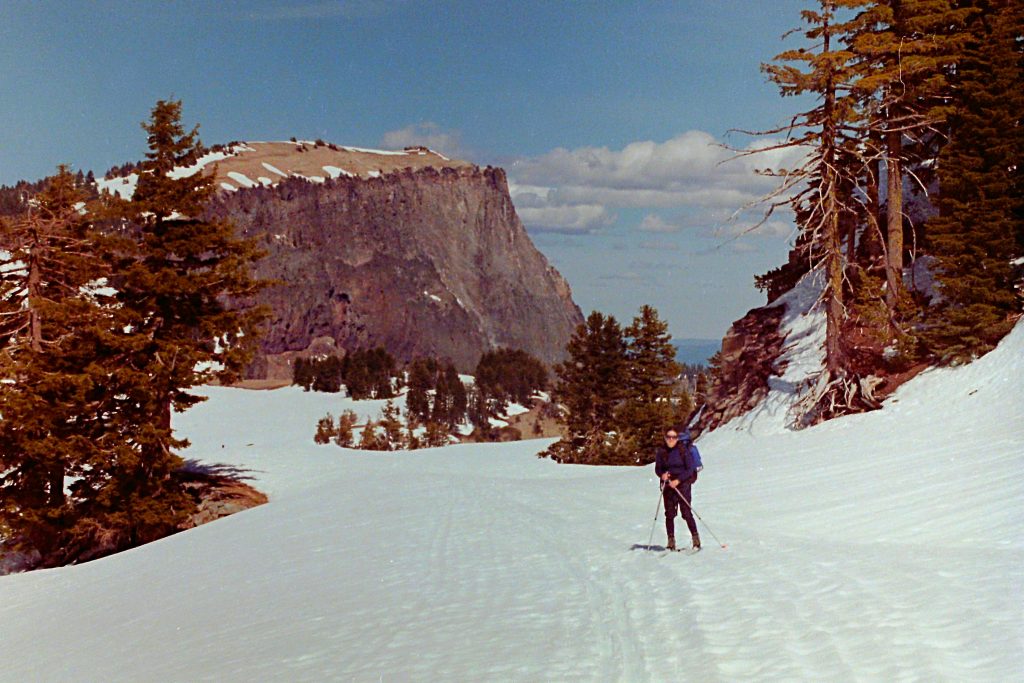
On Day 1, we traveled to the vicinity of Steel Cove which was roughly a 7-mile day. We crossed mostly corn snow that was settled enough in the open areas that you could walk on it. We found a nice campsite in the trees above Steel Cove. The snow was not as well consolidated in the trees and we had to dig down a bit to get a solid base for the tent. We beat a path from our tent to a viewpoint about 50 yards away where we sat, admired the lake and made dinner.
The view from our first campsite.
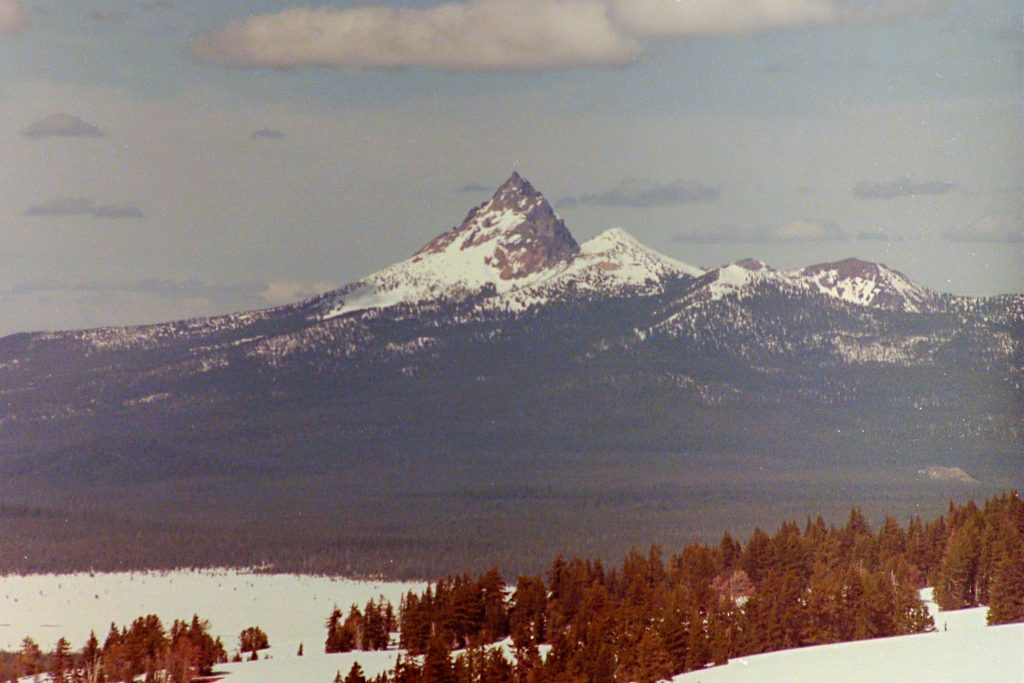
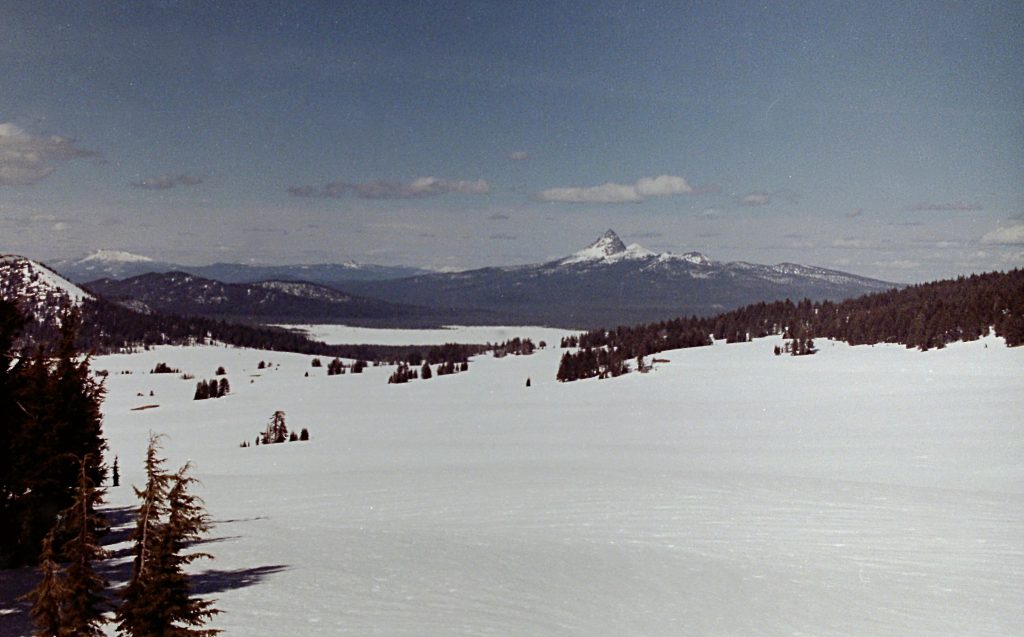
Looking north to Mount Thielsen.
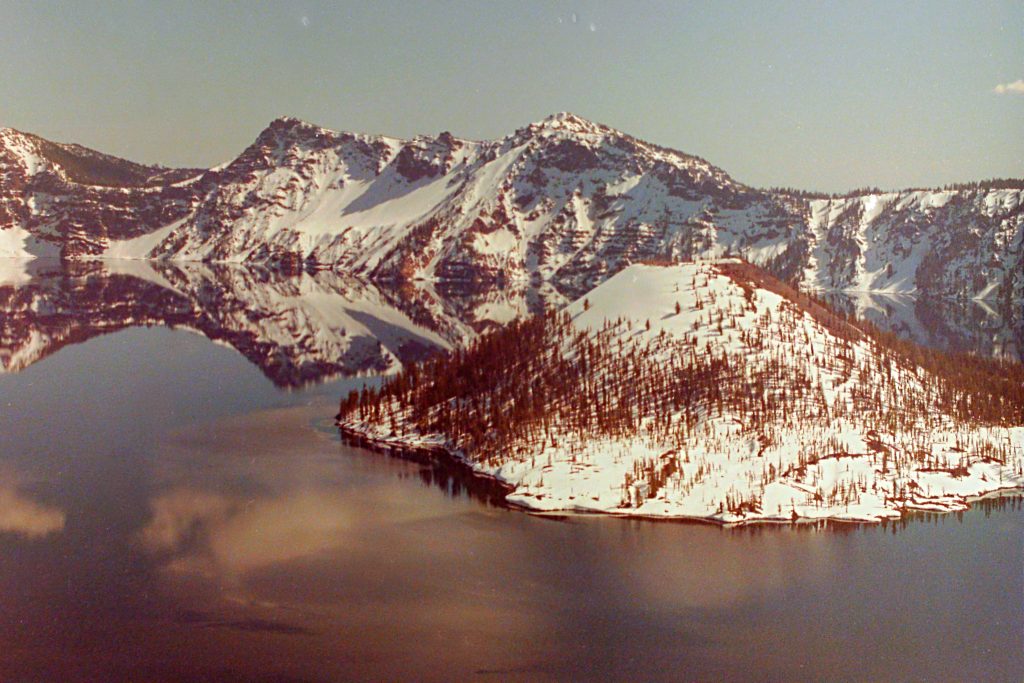
Day 2 took us to the Pumice Castle Overlook. We set up camp in the snowed-in parking area and had an unequaled view of the lake that evening. Our route ran 11 miles over firm snow. As I recall, I had to use skins on one climb because the weight of the sled was holding me back. Our campsite was west of Mount Scott. We had access nearby to open slopes which gave me the opportunity to make a few turns without the sled. If you are a better skier than I am and you have an extra day, an ascent of Mount Scott would be a challenging adventure.
Day 3 involved another 11-mile ski which took us past the Dutton Cliff, Applegate Peak and Vidae Ridge avalanche zones. Given our mid-April visit and the fact that 1990 was a low snow year, we were able to cross through these areas with no worries. The last day was a bit of a slog after we got our last view of the lake at Sun Notch. The road is mostly down hill after the notch but the day was warm and we had some slushy conditions for the last 5-6 miles with no views of the lake.
Consolidated snow everywhere.
As far as regulations, you will need a backcountry permit. They are free. Camping is allowed but your campsite must be at least a mile from the nearest plowed road and out of sight of any ski trail or route. It is best to ski the route clockwise from the standpoint of elevation gain and loss.
For trip-planning advice, call Crater Lake National Park at 541-594-3100.
Next: 1 for 2: Jefferson and Saint Helens