As the old saying goes, “A picture is often worth a thousand words.” John Platt provided the following photo guide to the Three Cracks Route.
Return to main Slick Rock page
Return to main Three Cracks page
The Three Cracks Route climbs a series of three cracks in the middle of the face and offers 8-9 pitches of sustained Class 5.4-5.6 climbing depending upon your line of travel.
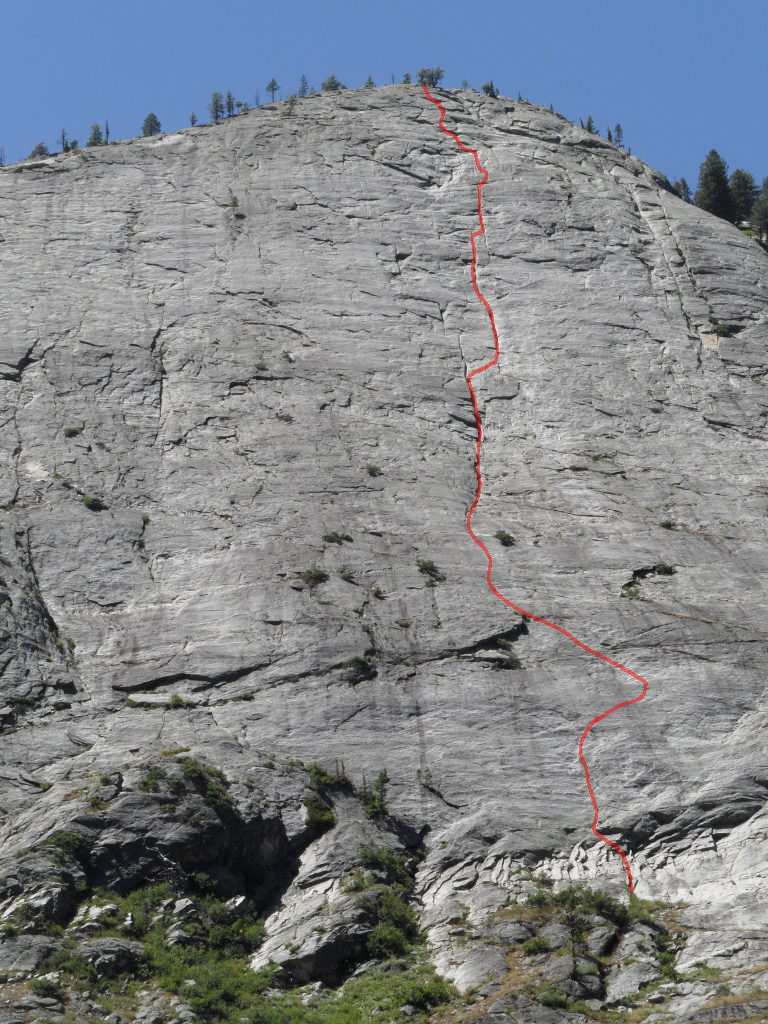
There are many possible variations used to climb the Three Cracks Route. This photo shows the general line. It is a general guide and not a rule. John Platt Photo

Here you can clearly see the starting dihedral and the blank wall you wander up and right. John Platt Photo
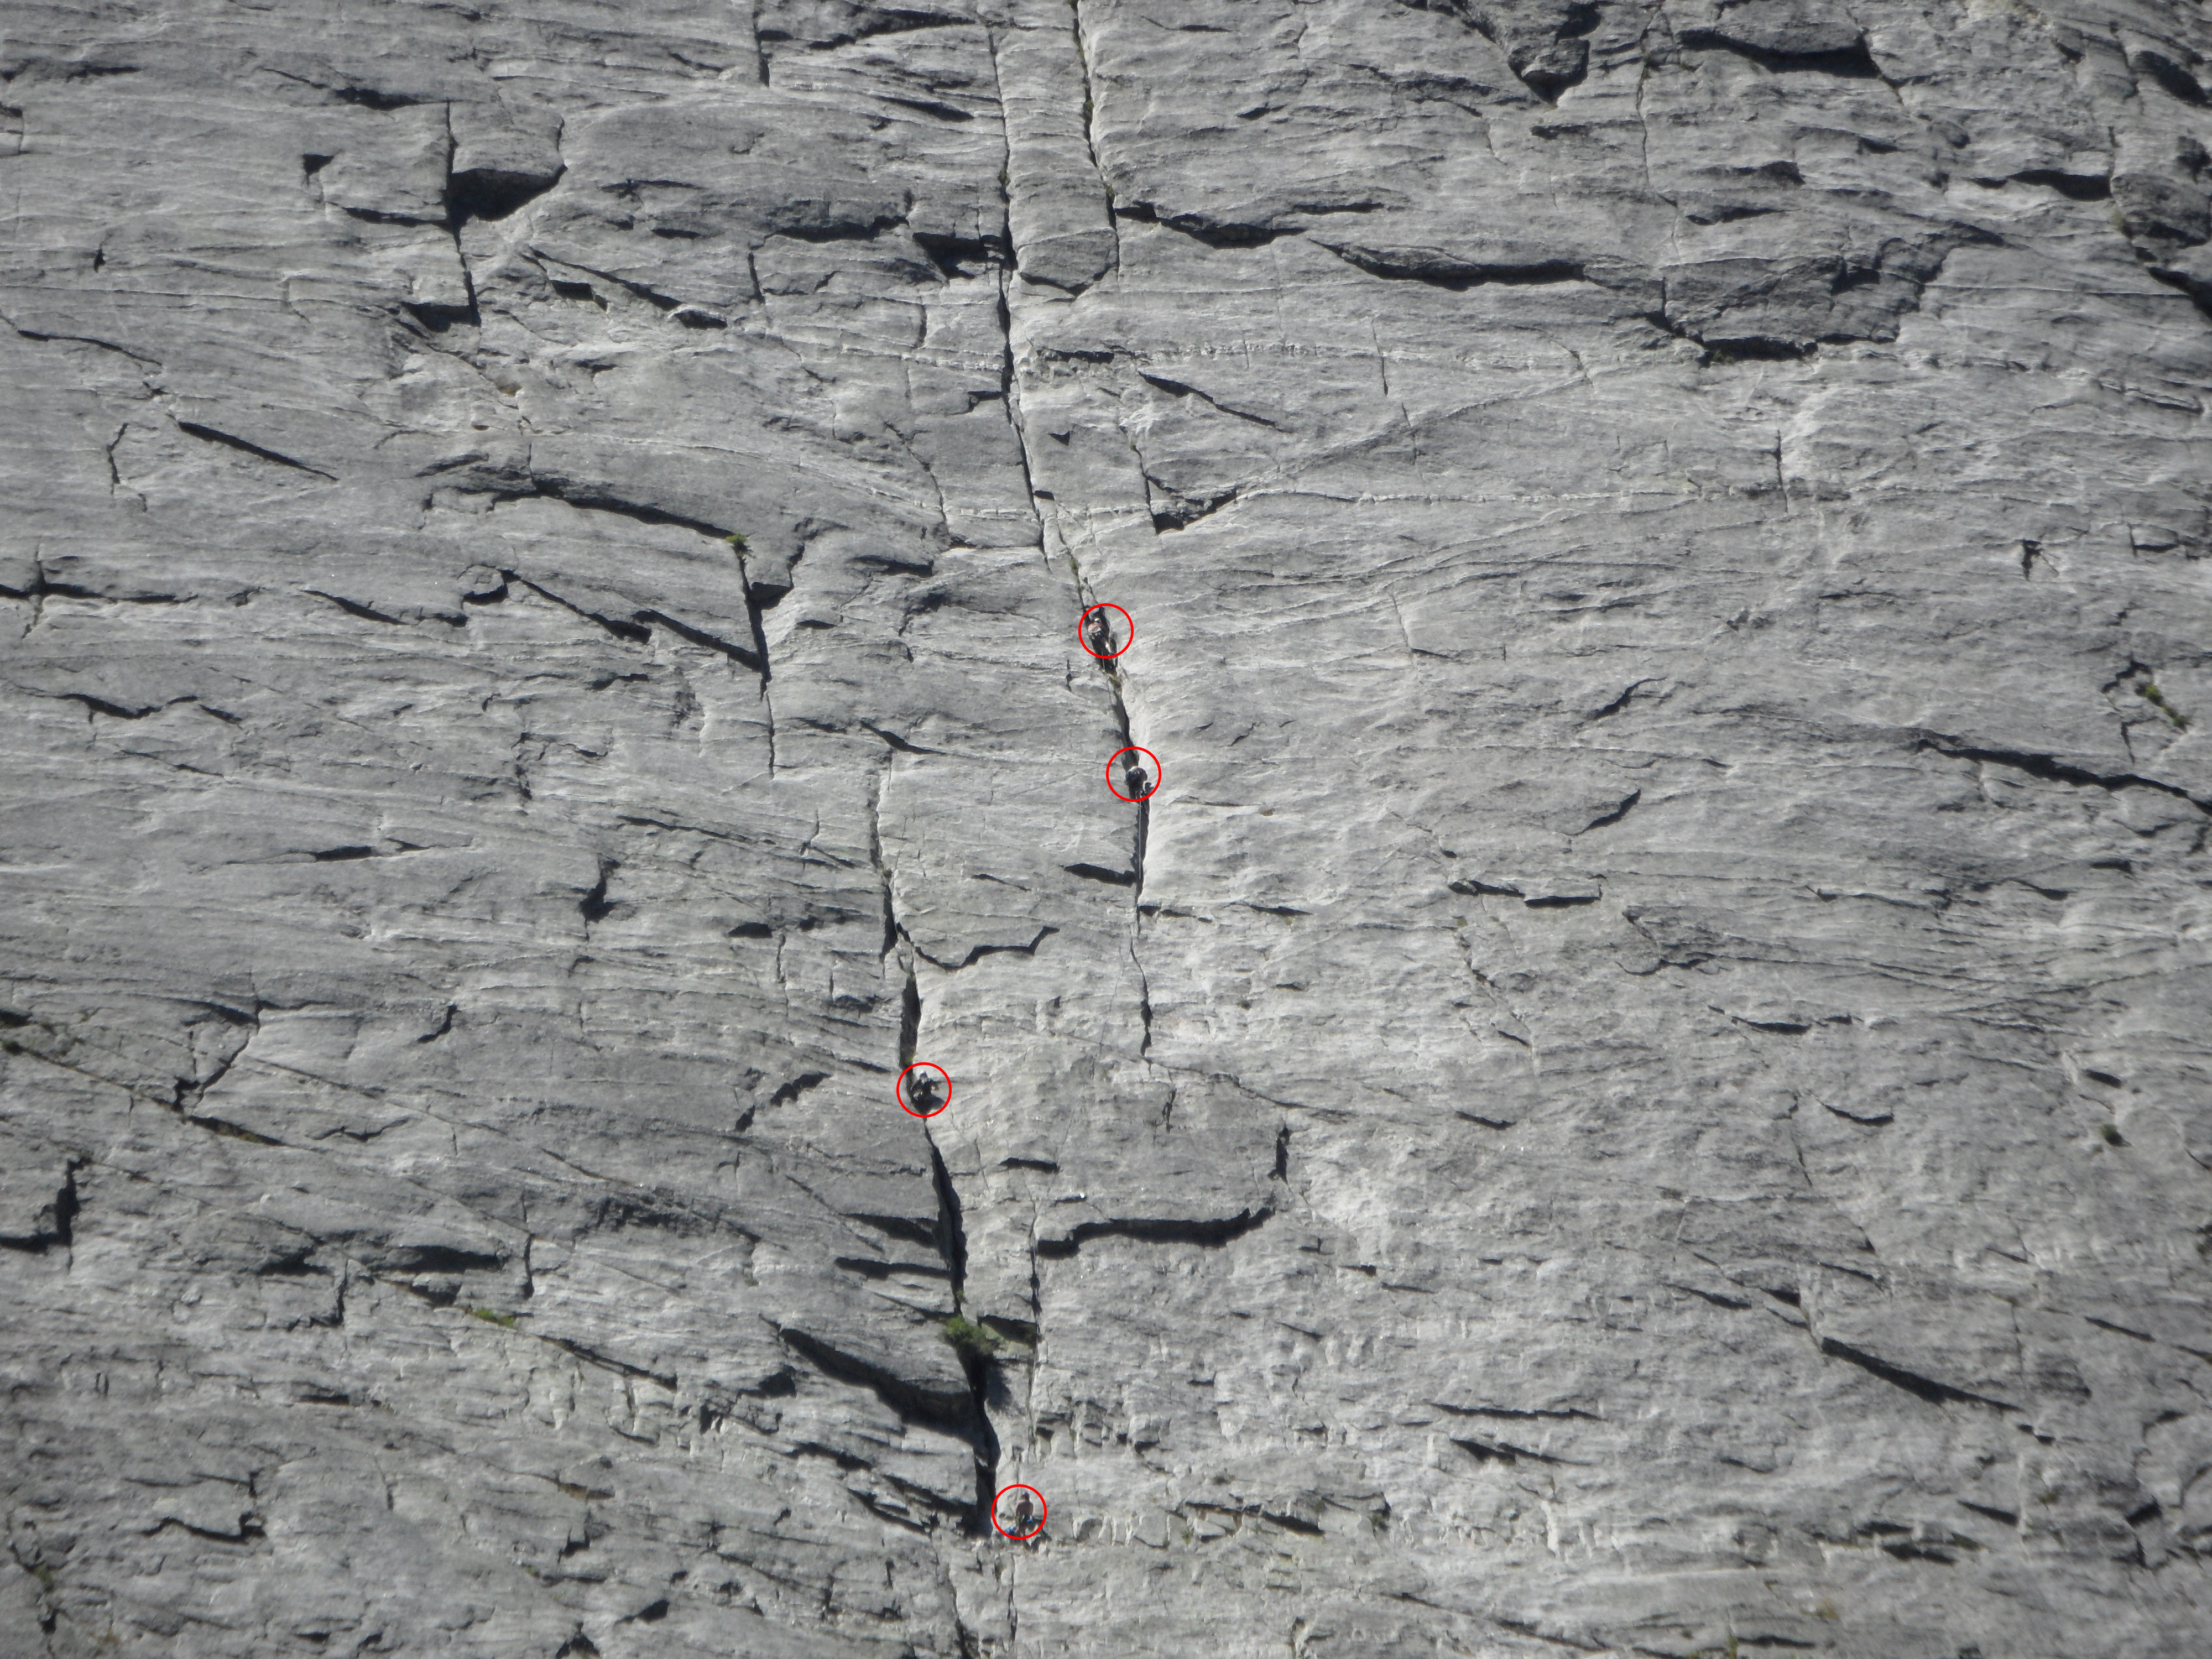
The 1st and 2nd cracks.
Note: Belaying in the cracks is uncomfortable. Instead, belay the second crack from the broad area just below. It looks vertical here but it’s ‘sittable’ perhaps with a bit of support from your anchor. John Platt Photo
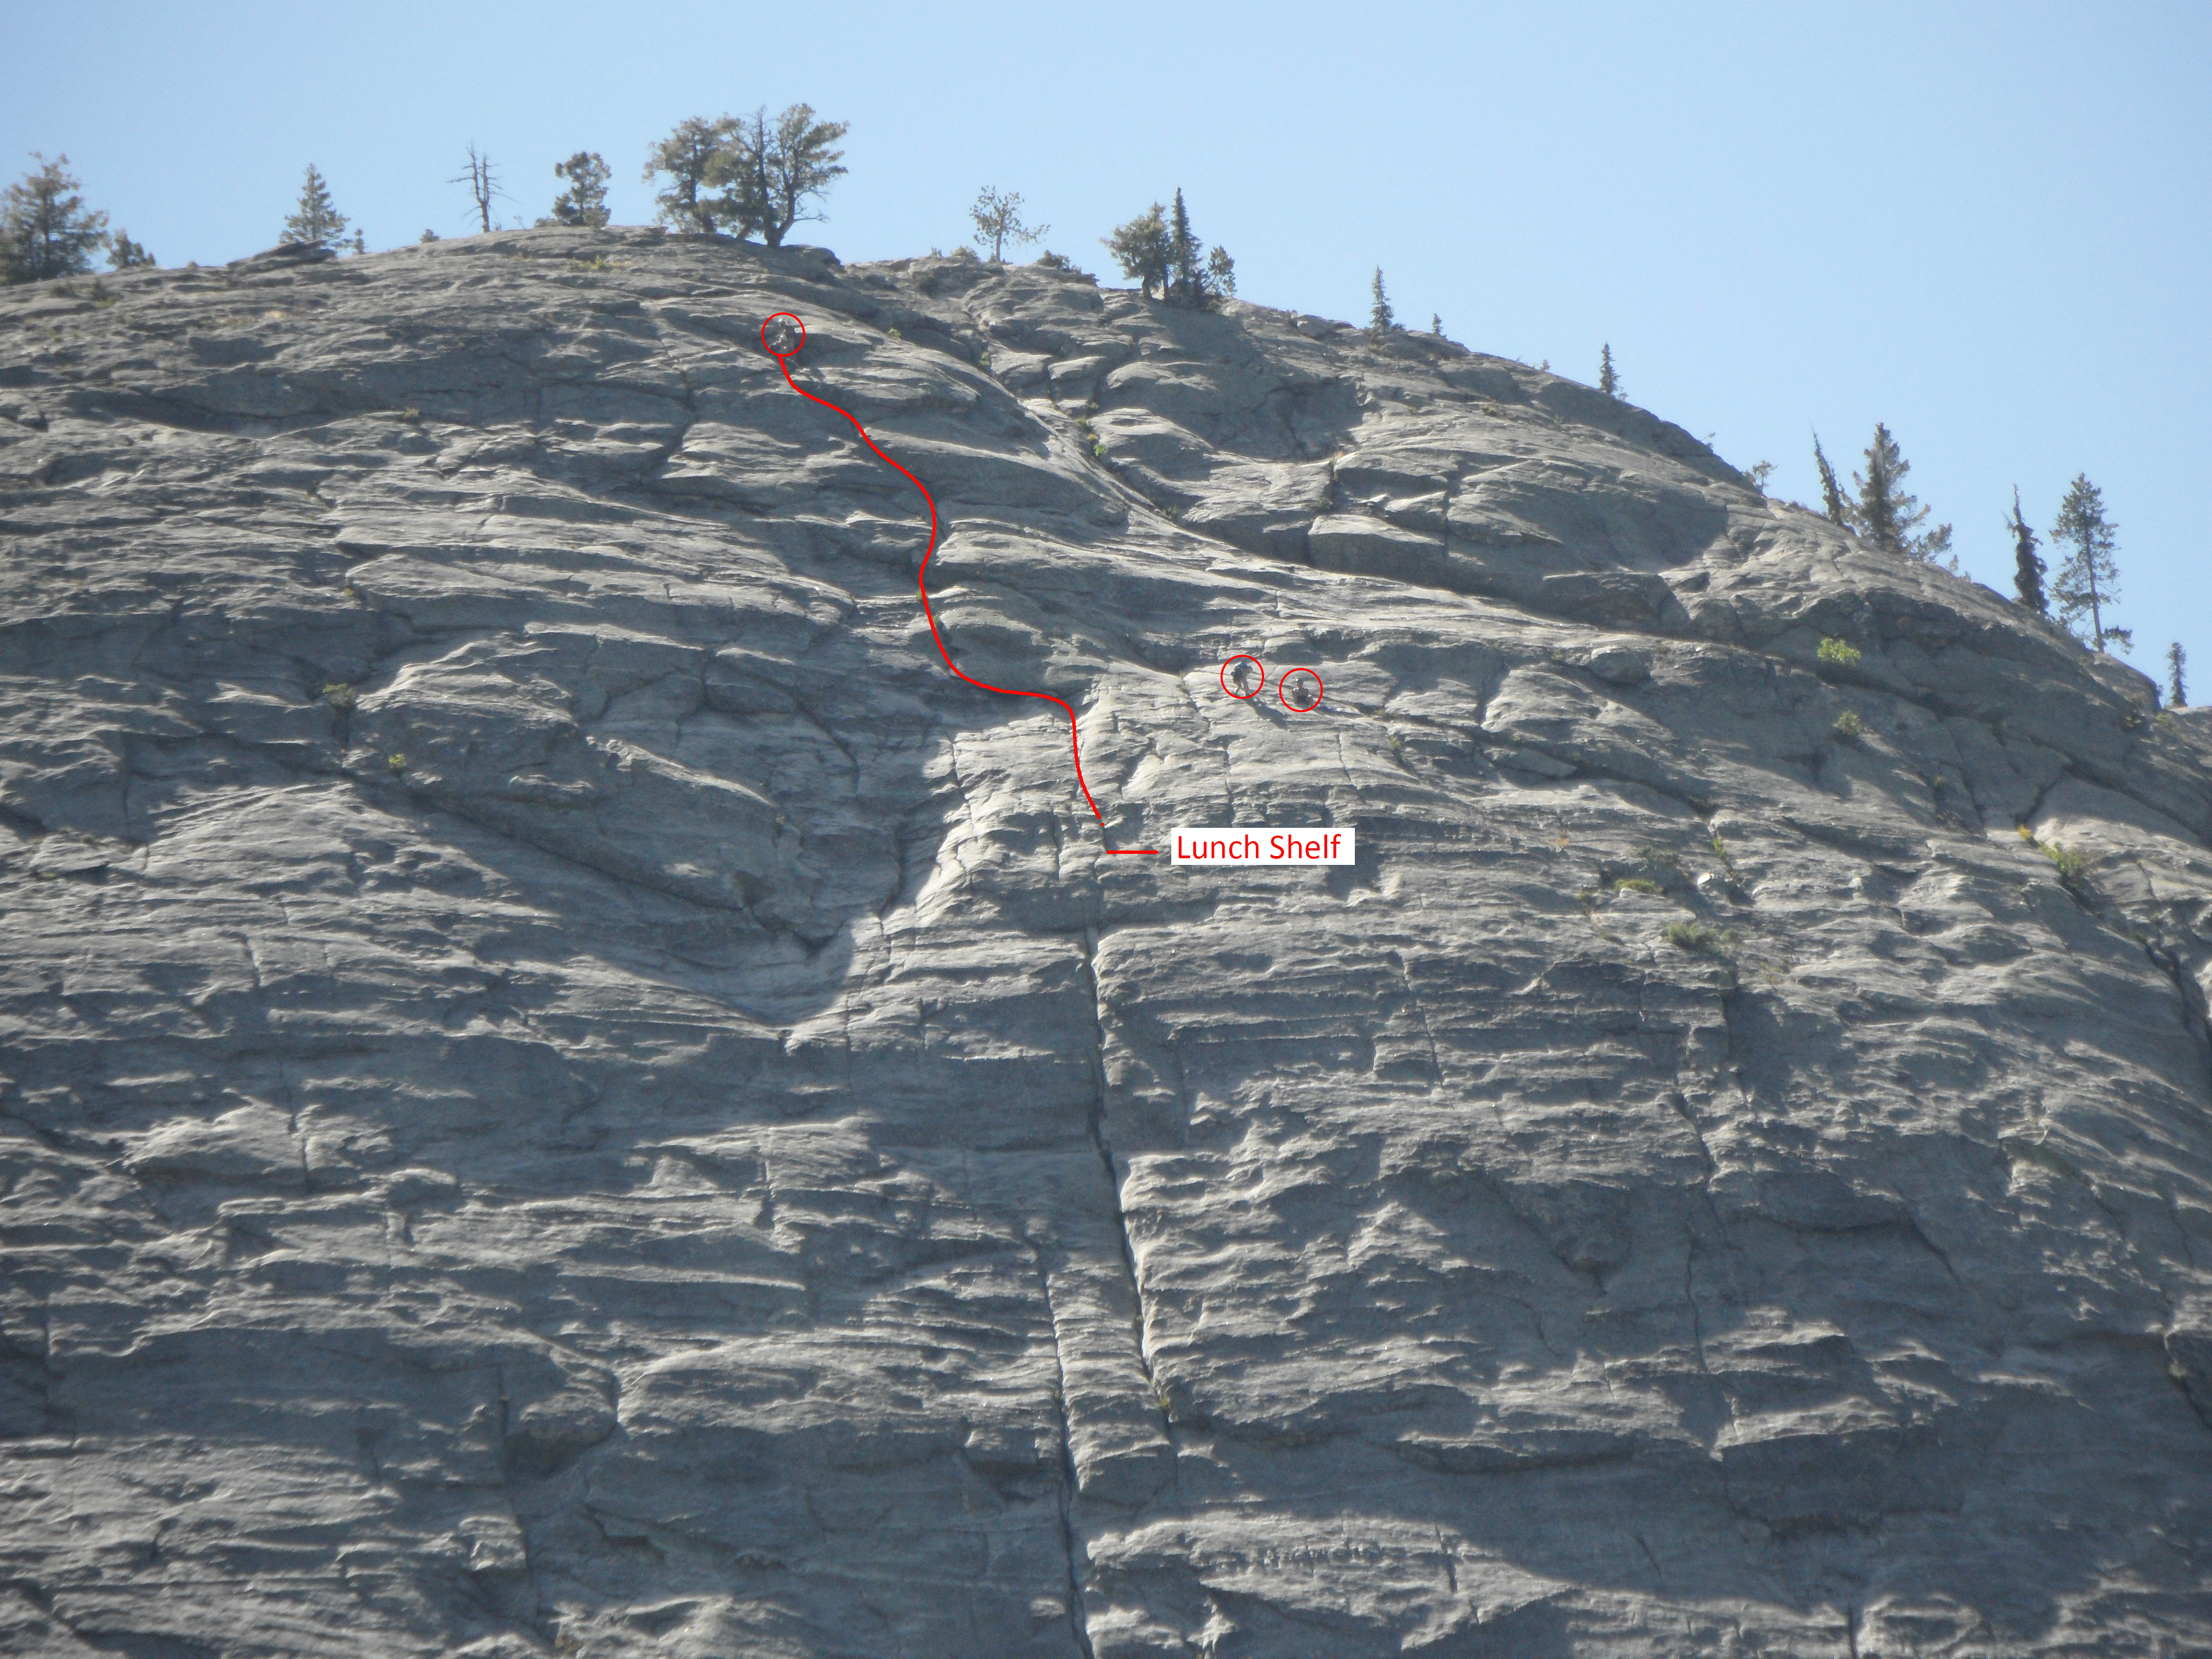
There seems to be some confusion about how to finish. I’ve done multiple exits from the Lunch Shelf but this is my standard path. The two climbers to the side are finishing Memorial (the bolted route).
I also labelled the Lunch Shelf which is not easy to see even from this perspective. John Platt Photo
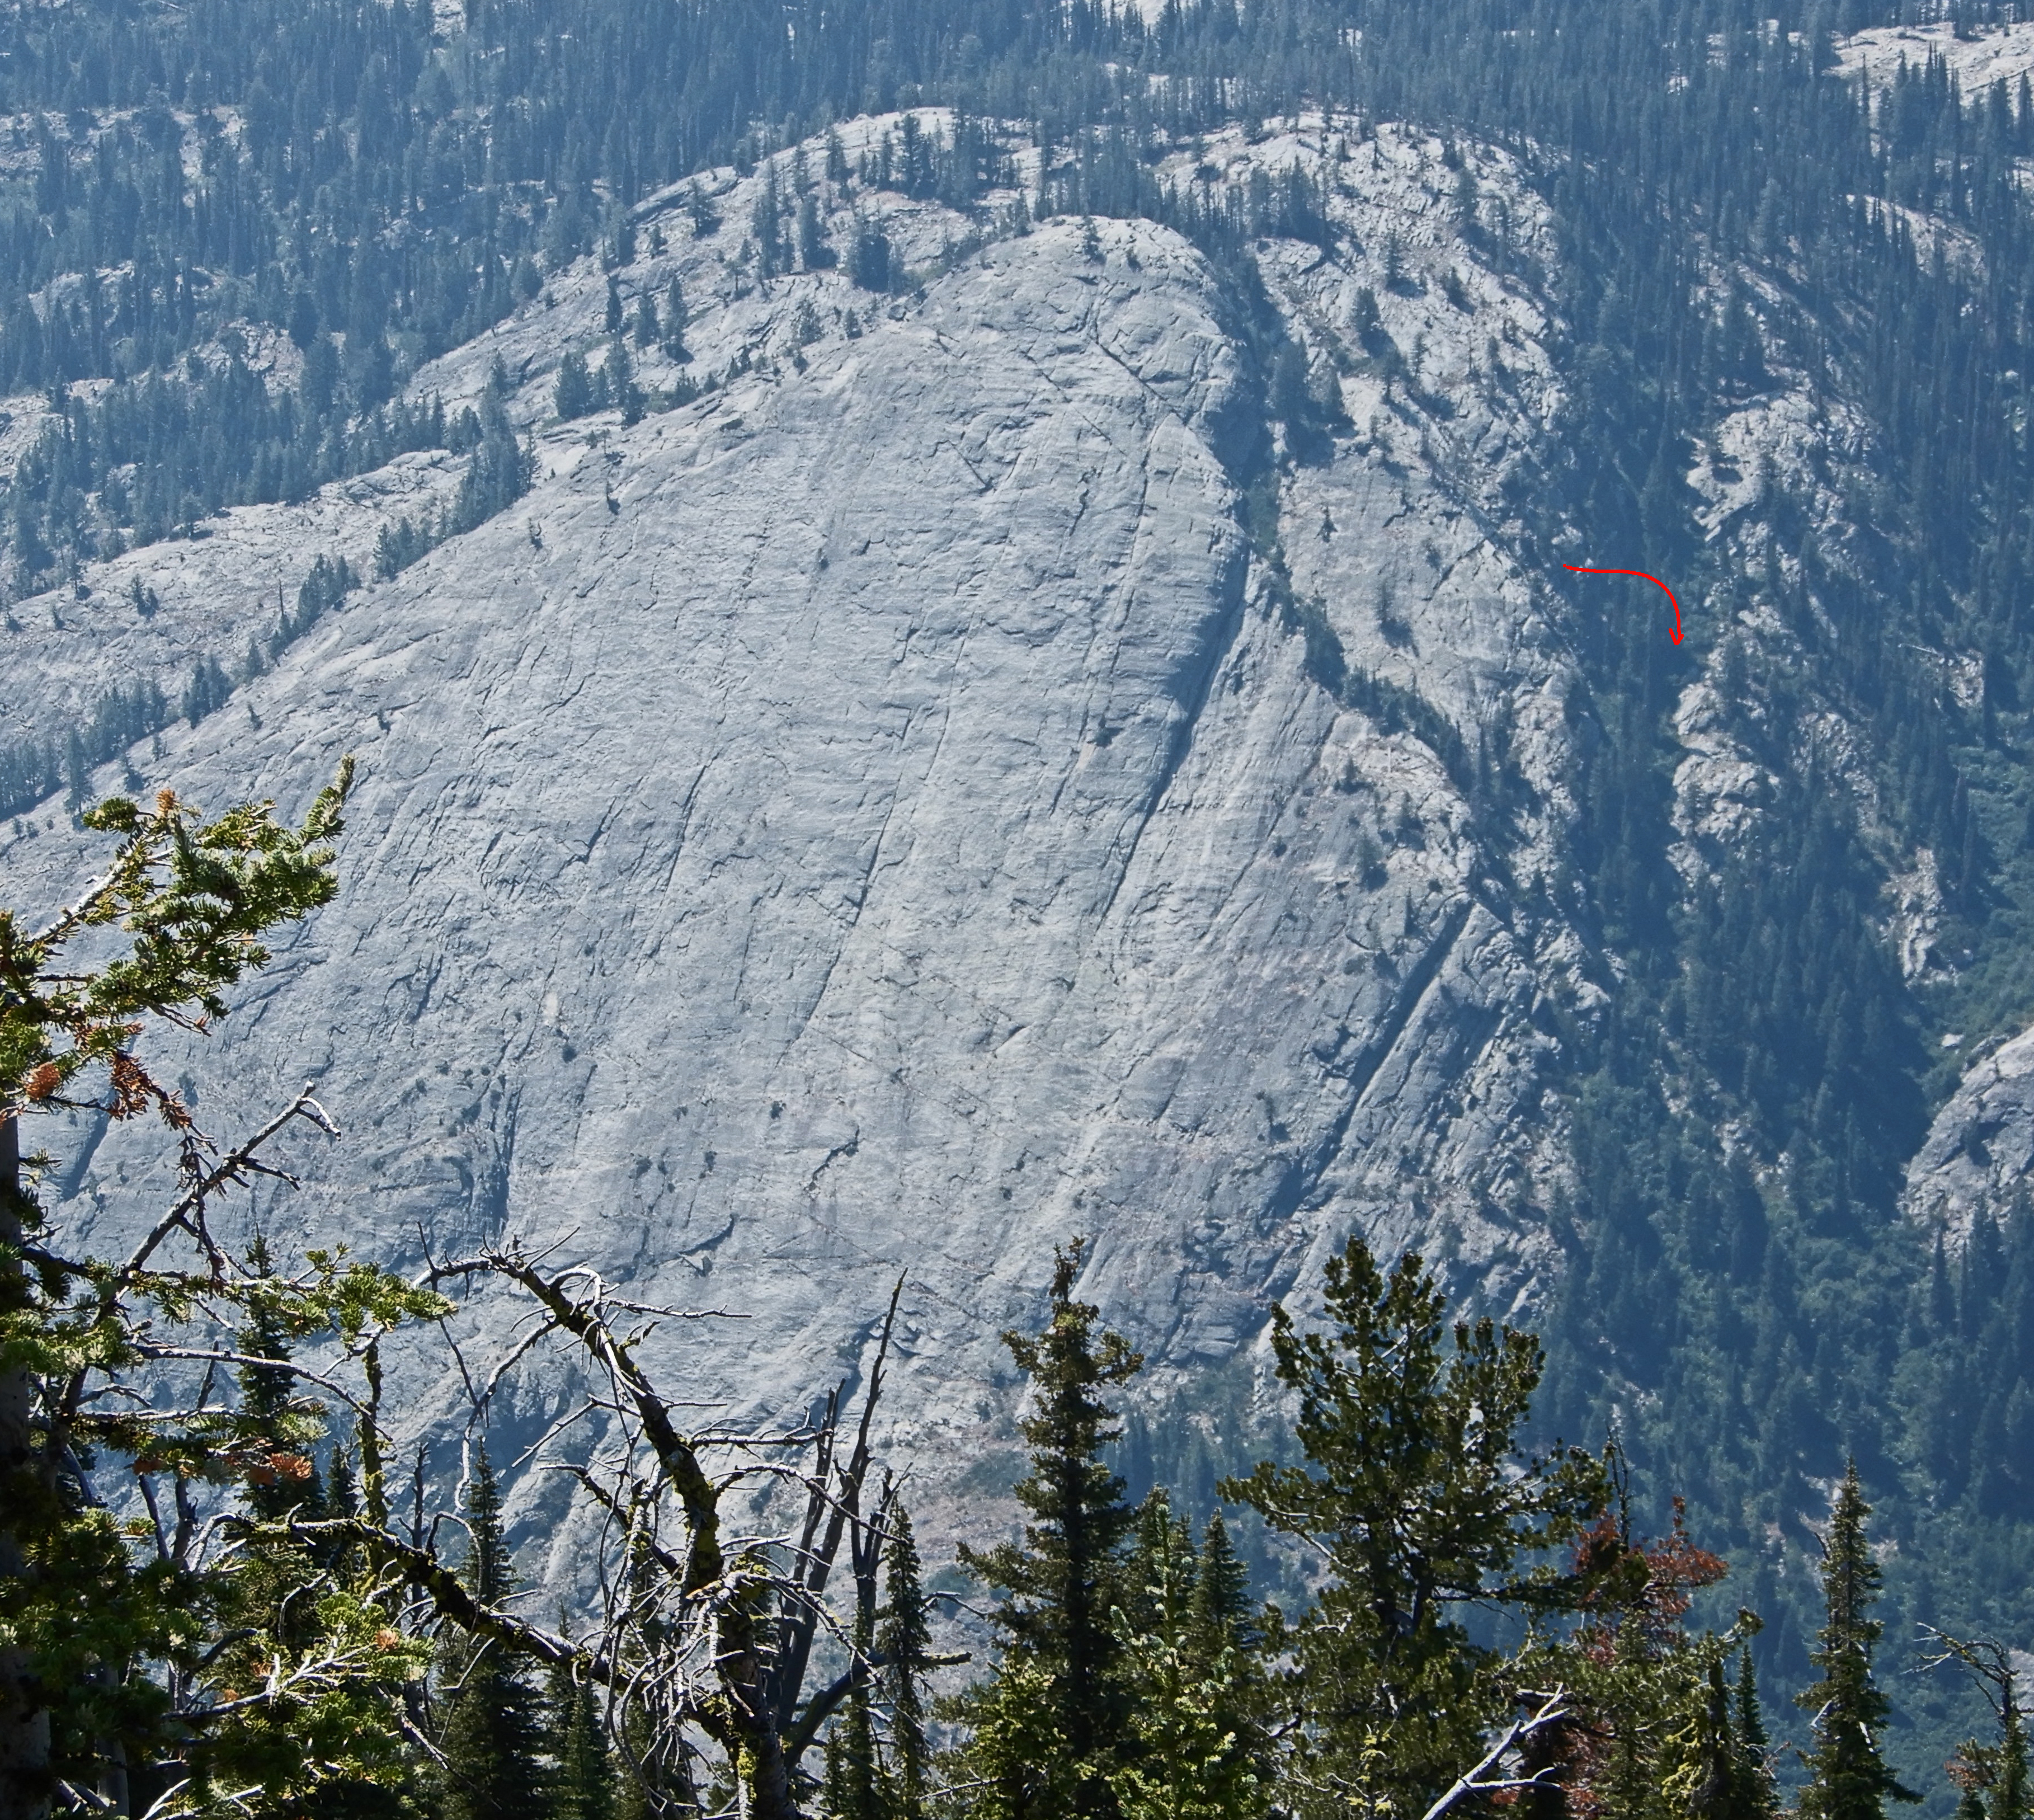
This photo is from (or near) Golden Lake Peak. It shows the texture and features of the rock well and the descent gully which is tricky to get into. You don’t want to follow the snaky line of trees as that may require a rappel. Instead, follow the lightly-treed ramp above by turning a not-so-obvious blind corner. John Platt Photo