Craters of the Moon National Monument
 This multi-peak climb and ridge traverse covers ten peaks in Craters of the Moon National Monument. The peaks include Grassy Cone, Sunset Cone, Inferno Cone, Big Craters, Silent Cone, North Crater, Paisley Cone, Broken Top, Big Cinder Butte, and Half Cone. In addition, you will bag Sunset Benchmark. Four of the peaks are ranked summits (Grassy Cone, Sunset Cone, Silent Cone, and Big Cinder Butte). The other six peaks are named, unranked summits. If you start in early morning, you’ll be finished by 1PM, just in time for a late lunch.
Access
All of these peaks are accessed from either the Loop Road (and side roads) at Craters of the Moon National Monument or on the north side of US-20 within a mile of the Visitor Center. All of the peaks are within the confines of Craters of the Moon National Monument. You will need a 1-day Backcountry/Wilderness permit to climb Sunset Cone since it is within a restricted area.
Overview
The peaks are discussed in the order in which they were climbed. A few of the peaks are climbed individually; others are climbed in a multi-peak sequence. Some driving is required between the starting points for the various hikes/scrambles.
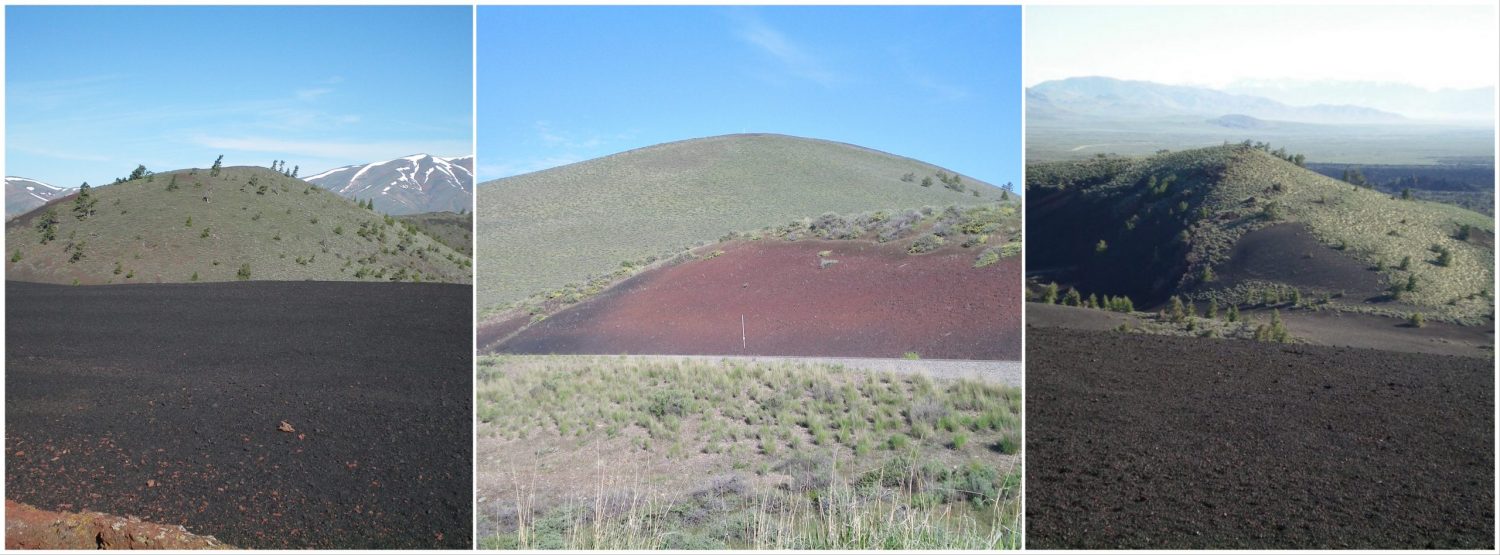
Grassy Cone (6,315 feet)—Peak #1:
From the entrance to Craters of the Moon National Monument, drive 0.8 miles west on US-20 to the [higher] second pullout on the left/south side of the highway (6,000 feet). From the parking pullout, cross to the north side of the highway and bash your way up a steep hillside of thick sagebrush and prickly bushes to the summit area (east summit). The east summit is a mix of scrub and open areas of lava gravel/talus. There was no summit cairn so I built one.
The west summit is completely bare and is a hump of lava gravel. The USGS topo map contours make the west summit appear to be much higher than the measured east summit, but it’s not. The traverse from the east summit to the west summit is not fun. The terrain is thick with sagebrush and prickly brush. You must drop 45 vertical feet to a minor saddle then climb 30 vertical feet to reach the west summit. From the west summit, descend S down the steep face to reach US-20. The brush/sage here isn’t as bad as on the steeper southeast face but it’s still unpleasant. Once you reach the highway, walk east about 0.2 miles to the parking pullout and your vehicle.
Sunset Cone (6,410 feet)—Peak #2:
From the entrance to Craters of the Moon National Monument, drive 0.8 miles east on US-20 to a large, paved pullout on the right/south side of the highway (5,845 feet). Walk west on US-20 to a gated side road on the north side of the highway. Wilderness permit in pocket, walk briefly up this road to reach the base of the southeast face. Leave the road and bushwhack west up through thick sagebrush and prickly brush to reach the antenna-clad summit. From the summit, descend the face southeast to find Sunset Benchmark.
It is just above a gravel access road that cuts across the lower section of the southeast face. It is marked with a metal post (witness marker) that is visible if you look for it. The actual benchmark (there are two of them) is hidden nearby on the ground in the sagebrush, encased in concrete. After visiting the benchmark, continue southeast through more sagebrush/bushes to reach the gravel access road. Follow the road northeast back to the main access road. Return to US-20 and walk east for 0.2 miles on the highway to the parking pullout.
Inferno Cone (6,181 feet)—Peak #3:
Drive up the Craters of the Moon National Monument Loop Road to the parking pullout for the Inferno Cone “trail.” The elevation here is 6,040 feet. From the parking area, follow a well-beaten footpath in the gravel/cinders up to the summit area. Return to the parking area.
Big Craters (6,295 feet)—Peak #4:
From the parking area, cross to the west side of Loop Road and scramble west straight up a slope of sagebrush and scrub. When you reach the top of the hill, you emerge on the East Rim of the largest crater. The high point of Big Craters is on this rim. The rim is a narrow, gravelly ridge, so watch your footing and don’t get too close to the edge. The views down into the craters are amazing. Big Craters comprises a total of three craters, the southeast crater being the largest and deepest and the northwest crater being the smallest and shallowest.
From the high point on the east rim of the Southeast Crater, follow the rim of the crater north then northwest then west to reach the North Crater Trail on the west side of all three of the Big Craters. The final section of rim is a cat walk between the southeast crater and the center crater. Watch your footing here as the terrain is crumbly lava rock/gravel. Follow the North Crater Trail northwest down to the connecting saddle with Silent Cone.
Silent Cone (6,070 feet)—Peak #5:
From the connecting saddle with Big Craters (the North Crater Trail crosses this saddle), bushwhack southwest up a gully through dense vegetation and some downed timber to reach the northeast face. Scramble up the scrub on the face to reach the semi-open summit area of Silent Cone. The summit is a ridge crest with some scattered pines. Return back to the connecting saddle.
North Crater (6,244 feet)—Peak #6:
From the 6,070-foot connecting saddle, briefly follow the North Crater Trail northward. Leave the trail to skirt around the northwest shoulder of Big Craters to reach the base of the southwest face of North Crater. Scramble up very loose lava gravel to reach the more stable terrain of the southwest ridge. Cruise up the easy southwest ridge on lava gravel to reach the rocky summit of North Crater. From the summit, descend east on gravel then grass/scrub then blocks of lava to reach the gentle gravel saddle at the base of the northwest ridge of Paisley Cone.
Paisley Cone (6,107 feet)—Peak #7:
From the gravelly saddle at the base of the northwest ridge, scramble up loose lava gravel then scrub/grass to reach the ridge. Follow the ridge on scrub/grass to the narrow, rocky outcrop that is the summit of Paisley Cone. From the summit, descend the crumbly, rocky south ridge to a gravel slope lower down. Follow a footpath on the gravel slope leading southwest to intercept the Loop Road. Hike up the Loop road a short distance to reach the Inferno Cone trailhead parking area. The exposure on the right/west side of this ridge is serious, so be careful.
Broken Top (6,058 feet)—Peak #8:
Drive up the Craters of the Moon National Monument Loop Road to signed turnoff for the Tree Molds Trail. Drive 0.6 miles south on this road to a nicely-shaded picnic area on the left/east side of the road just before the road reaches a sharp right bend. Park in a pullout here (5,850 feet). This is a short-cut route to quickly reach the Broken Top Loop Trail. Alternatively, you can drive farther along the road to reach the official trailhead for the Broken Top Loop Trail and hike up from there.
From the picnic pullout, bushwhack south up through dense forest to quickly intercept the Broken Top Loop Trail. You will find the remnants of an old trail to help you with this short bushwhack through the forest and brush. Cross the Broken Top Loop Trail and bushwhack south up through thick sage and prickly brush to reach the rocky open summit of Broken Top. From the trail crossing, it’s only about 100 vertical feet to the summit. From the summit, descend the open, easy south face on lava scree and gravel. You will quickly reach the Buffalo Caves at the base of the south face.
Big Cinder Butte (6,515 feet)—Peak #9:
From the Buffalo Caves, scramble south across lava flows and lava slab rock to reach the gully at the base of the north face of Big Cinder Butte. Cross the gully and scramble up crumbly lava face rock then loose gravel for a short distance. From here, bash your way up through thick sagebrush and prickly brush to reach some open gravel areas. After a final section of scrub-bashing, you reach the top of Big Cinder Butte. From the summit, descend the arduous, thick scrub/prickly brush on the East Face. The underlying loose gravel doesn’t help. Bushwhack through a short section of forest to reach the open terrain of the connecting saddle to Half Cone. The terrain here is mostly open lava gravel.
Half Cone (6,055 feet)—Peak #10:
From the connecting saddle with Big Cinder Butte, scramble northeast to the summit of Half Cone. The terrain here is easy open gravel on the lower half of the southwest face and then easy scrub/grass/gravel on the upper half of the face. The high point of Half Cone is a lava outcrop. Return to the saddle and hike northwest on the Wilderness Trail to its junction with the Broken Top Loop Trail. Follow the Broken Top Loop Trail around the east face of Broken Top to its north face. Descend back through a short section of forest to reach the picnic pullout and your parked vehicle.
Summary
To sum up, this multi-peak adventure begins with a climb of the southeast face of Grassy Cone. It descends the south face to return to the US-20 parking pullout. Drive 1.6 miles east on US-20 to another parking pullout. Climb the east face of Sunset Cone and descend the southeast face. Return to the parking pullout and drive into Craters of the Moon National Monument. Follow the Loop Road up to the Inferno Cone trailhead parking area. Park here.
Hike up the northwest face of Inferno Cone via a trail and return to the trailhead parking area. Scramble up the east face of Big Craters and descend its northwest ridge to a saddle. Bushwhack up the northeast face of Silent Cone then return to the saddle. Climb the south face/southwest ridge of North Crater and descend its east face to a saddle. Climb the northwest ridge of Paisley Cone and descend its south ridge. Hike up the Loop Road to return to the Inferno Cone trailhead parking area.
Drive farther up the Loop Road to a side road for the Tree Molds Trail. Park at a picnic pullout 0.6 miles south on this side road. Scramble up the north face of Broken Top and descend its south face to the Buffalo Caves. Do a cross-country scramble to the base of the north face of Big Cinder Butte. Climb the north face and descend its east face. From a connecting saddle, scramble up the southwest face of Half Cone and return to the saddle.
Follow the Wilderness Trail back to the Broken Top Loop Trail. Follow the Broken Top Loop Trail back to a point from which to descend to the picnic area along the side road for Tree Molds Trail. This completes the journey. In just over half a day, you have bagged 10 summits and a USGS benchmark. Congratulations!